Jumping rope is one of the best, low-impact exercises you can do. Not only is it a great workout but it can be done by virtually anyone at anytime with just a minimal amount of space and equipment. But, much like watching CNN, it can get boring and repetitive after a while and you may end wanting to bash your head in.

While you can do “tricks” or develop a different jumping rhythm to break up the monotony, a double under will present you with a new challenge and will make you a killer during your CrossFit workouts.
The below program works if you practice and stick with it. How do I know? Well, prior to doing the below, even though I could jump rope fairly well I was barely able to do a double under. Now I can do multiple consecutive doubles with ease 1 well, sometimes.
Overview

- Double Unders happen when the rope passed under your feet twice during one jump
- You can learn double unders in just a few weeks with some dedicated practice
- Make sure you have a good rope and it's sized properly
- Be aware of the common mistakes listed below and how to avoid them
So, what is it? How do you do? Well, let’s take a look at a 4-week plan to go from jump rope zero to hero.
What is a Double Under?
Typically, one jump equals one rotation of the rope under your feet. Hence the “jump rope” term. Mind blown, right? Anyways, double unders, or doubles or “dubs,” happen when the rope passes under your feet twice (or double) whenever you jump once.
The Double Under Plan
So now that we have a clear definition of what a double under is, let’s briefly outline the plan to go from jump rope zero to hero in just 4 weeks. I’m going to assume that you’re pretty new to jumping rope, although not exactly new to exercising in general. If so, you may need to step more time getting a base level of fitness before you’re able to successfully do double unders.
With that out of the way, let’s have a brief overview of the master plan:
Week 1: Learn single unders
Week 2: Double under prep
Week 3: Do a double under
Week 4: Become a double under master
Prerequisites:
A Jump Rope
I’ll recommend a couple ropes below but, truth be told, there are a variety of ropes you could use and it’s very difficult to find the best jump rope.
While I don’t have a go to rope brand, there are some commonalities to a great rope. You’ll want a rope that is:
- Lightweight so you don’t get overly tired
- Heavy enough for some control
- The rope itself should be light like a wire so you can spin it fast. You absolutely have to spin the rope quickly (via your wrists) in order to do a double under.
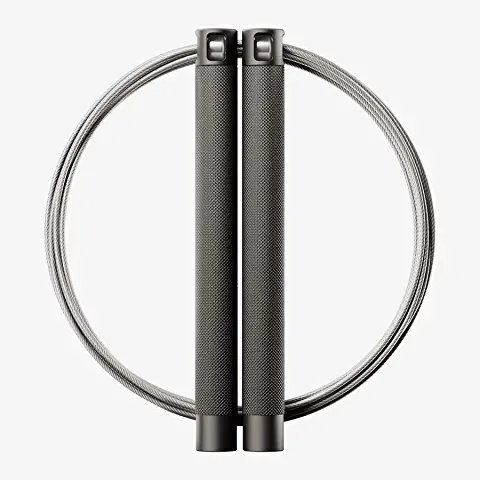
Jump ropes with those features are usually called a speed rope and should be used in lieu of a heavier rope. Here are some great options:
| IMAGE | PRODUCT | |
|---|---|---|
Best Overall  |
| View On Amazon → |
Best Value  |
| View On Amazon → |
Good Yet Cheap  |
| View On Amazon → |
Sizing Your Rope

Having the proper length on your jump rope is of the utmost importance. If your rope is too long, it’ll hit the ground too far in front of you. If it does that you’ll have to jump higher in order clear it and will lose efficiency.
To get the proper length for double unders, stand on both feet with the rope under your feet and pull upward on the handles. The jump rope handles should fall at bottom of the rib cage and your chest.
With that said, let’s look at the high-level plan. I’ll give some guidelines below as to when you should move to the next week but you can absolutely modify it for your skill and fitness level.
Week 1: Master single unders
Goal: At least 100 unbroken single unders
In order to be able to perform a double under, you have to first master the coordination, timing, and skill of doing single unders. According to double under World Champion Tori Boggs, you want at least 100 unbroken – meaning continuous – single unders before even attempting a double. Personally, I would shoot for at least 250 unbroken. For most folks, that’s probably going to 2.5-3 minutes straight.

Without going into a full tutorial on just how to jump roper, there are a few key elements to keep in mind when jumping rope.
- Make sure you’re relaxed. Your body and head should be in a neutral position without excessive tilt or lean.
- Land on the balls of your feet with your knees slightly bent and relaxed shins (don’t pull your toes up).
- Use your wrist (not your arms) to control the rope speed
- Keep your hands close to your hips, with your elbows bent and pulled back.
If you’re new to jumping rope, there are different strategies to build up your unbroken singles. For example, if your schedule allows, take 10 minutes twice a day and just work on your technique and building up your stamina. Or, maybe, you do one minute “on” (i.e. jumping rope) and follow it with one minute “off” (i.e. recovery).
However you want to do it, you’ll want to spend the first week working on learning how to jump rope and building up your consecutive single unders.
Week 2: Double Under Prep
Goal: Timing, Coordination, and Speed

This week is akin to practicing double unders without actually doing one. While you continue to work on the single unders, we’ll start to focus on the proper technique to complete double unders.
Some things you will focus on:
- Jumping and landing quickly and softly on the ground using the balls of your feet. No heel landing!
- Efficient rope spinning technique so that you can spin the rope faster and longer
- Coordination between your arm movement and jumps. This is the biggest “secret” to double unders.
In order to do the above, there a couple drills we’ll work on.
Dub Drill 1 – Claps, Slaps, and Swings
A good starter to get the rhythm down in which you’ll just be doing the hand motions and mimicking your eventually double under technique. It looks kinda odd so you might want to do in the comfort of your home or just ignore the people staring at you. Rather that try to fully explain it, it’s quicker and easier to just see it in action –
Dub Drill 2 – Same as above but with “Power Jumps”
This drill is the same as the one above but now you’re going to add in a power jump to go along with the above motions. (A power jump is just a slightly stronger jump). This drill further preps you for having the right rhythm and motion down for when you actually add in the rope.
Dub Drill 3 – Same as above but add in a rope
This further preps you for the full double under by adding in rope swings to the motion you perfected in the prior two drills. Again, it’s best to watch Tori demonstrate.
Week 3: Perform A Double Under
Goal: Do a double
Now that you’ve done the drills and gotten down the proper cadence, it’s time to implement what you practiced and get your first double.
First, start with some basic single to get warmed up. Once you’re sufficiently warm, it’s time to try your first double. I prefer to do a couple unbroken singles and then do one double. So, for example, I’ll do 4 single unders and then on the 5th one I’ll do a double under. That’s one set.

After I do that, I’ll stop and take a quick mental (or physical) break and quickly evaluate what I did wrong (or right!). Once I’ve reset, I’ll do another set. Once I can do this effectively, start removing the number of single unders you do before your double attempt.
Don’t get discouraged. Going from a single under to a double under is a big jump (pun intended). You most likely will get a little frustrated but keep trying. You’ll get there.
– Me
So, maybe, I’ll do 4 singles and 1 double under on the 5th attempt. If that’s difficult, I’ll simply stay with that cadence until it’s comfortable. Once it is, I’ll drop the singles down and do 3 singles and 1 double. Then 2 singles and 1 double and so on.
You’ll (most likely) want to do this over a span of multiple days during this week. By the end of the week you should be able to do just 1 single and 1 double. And you’ll be able to do that for multiple reps.
If you can, then you’re ready to progress to the next week and go for some unbroken double unders.
Week 4: Unbroken Double Unders For Reps
Goal: Unbroken double unders
At this point, you should be pretty comfortable with your jump rope. Not only can you do hundreds of unbroken single jumps but you can do at least one double under for reps. So now it’s time to work on multiple consecutive double unders.

To help with that, you can try the following drill –
Double Under Ladder Drill
This is a pretty simple drill in overall steps, although it’s not quite as simple to perform. Basically, you’re just going to do a “ladder” and work your way up to multiple consecutive double unders. So, here’s what you do:
- Do 1 double under then stop
- Do 2, then stop
- Work your way to to a challenging number – say, 5 of them – and then work your way back down the ladder
Like I mentioned, don’t confuse simple with easy. Don’t worry if you can’t go up the ladder on the first try. Stick with it. This is meant to be difficult and will get your heart rate racing so be sure to grab enough rest so you can focus on your form.
Once you’re able to work your way up (and maybe down) the ladder, you’ll have done multiple unbroken double unders! As you get stronger and more efficient in your movement, you’ll find it easier to add on additional dubs.

At that point, you’re ready to go for the vaunted triple under. And, yes, that’s really a thing.
Common Mistakes
Mistake #1 – Incorrect Rope Length
Having a rope that’s too long or too short is going to cause issues in learning double unders. You want be in the “goldilocks” zone where it’s the perfect length to allow you to spin the rope properly. See what I wrote above or this video if you want to learn how to set the perfect size.
Mistake #2 – Too much arm, not enough wrists

A pretty common mistake is using your arms to swing the rope. Not only is this very inefficient, it will make it much more difficult to perform double unders as you won’t be able to generate enough rope speed.
The basic form is to have your elbows close to your sides in a pulled back position (similar to a row) so your hands are by the outside of your hips. You then use your wrists to generate rope spin.
Mistake #3 – Poor hand position
Your wrist movement generates the subsequent rope spin. In order to generate rope speed and stay relaxed, you have have hand placement. So what’s proper placement? Mainly, you need to properly size your rope so it’s at the correct length.
Once you’ve done that, keep your arms slightly bent with your elbows pulled back like in a row. That should align your hands close to your hips which is the optimal positioning for spinning the rope efficiently and quickly.
Mistake #4 – Not mastering coordination
Most people – myself included – just want to do double unders. We don’t actually want to do the work necessary prior to doing one. But in order to have your cake, you gotta bake it first, right? If you don’t master some basics, you’ll end getting frustrated and not meeting your goal. Review this section if you want some drills you can do.
Mistake #5 – Jumping too high
While jumping higher is a good thing, you don’t want to jump too high. Why not? While your “power jump” height vary some, in order to string together double unders you have to be able to jump consistently and efficiently. Focusing on jumping high tends to lead to poor form (as you only focus on jumping) and will make your workouts that much harder.
Additionally, if you jump too high not only will your jump height vary as you get tired, you’ll get tired much more quickly. Just remember that a higher jump doesn’t always equal a better jump. You need to find that delicate balance where you can sustain your jumps while still jumping sufficiently high to do double unders.
Mistake #6 – Improper jumping
Similar to the last mistake, you want to avoid poor jump quality by avoiding “piking” and “donkey kicking.” Piking is simply when you keep overly straight legs and your hips “pike” backward. Not only is it inefficient, you’ll end up negatively changing your hand and arm position to account for the pike.

The opposite problem – donkey kicking – is when you kick your feet back by pending too much at the knees. Remember, you want to be relaxed and try to keep a normal jump form.
Summary (TL;DR)
Learning double unders is one of the more satisfying things you can do with a rope 2depending on what you’re into *wink* and has benefits across probably almost any sport you can think. Not only is it a cool looking exercise, it also helps with timing, coordination, leg strength, and cardiovascular endurance.
I’ve successfully used the steps outlined above to take my double unders from, well, zero to multiple unbroken ones. If you practice (and then practice some more) I have no doubt you’ll be able to do the same. Happy jumping.