One of many overhead pressing variations, the Z press can help build muscle, stability, and strength. It’s simple but not easy. Here’s what you should know.
Z Press: Develop Your Shoulders In One Simple Move
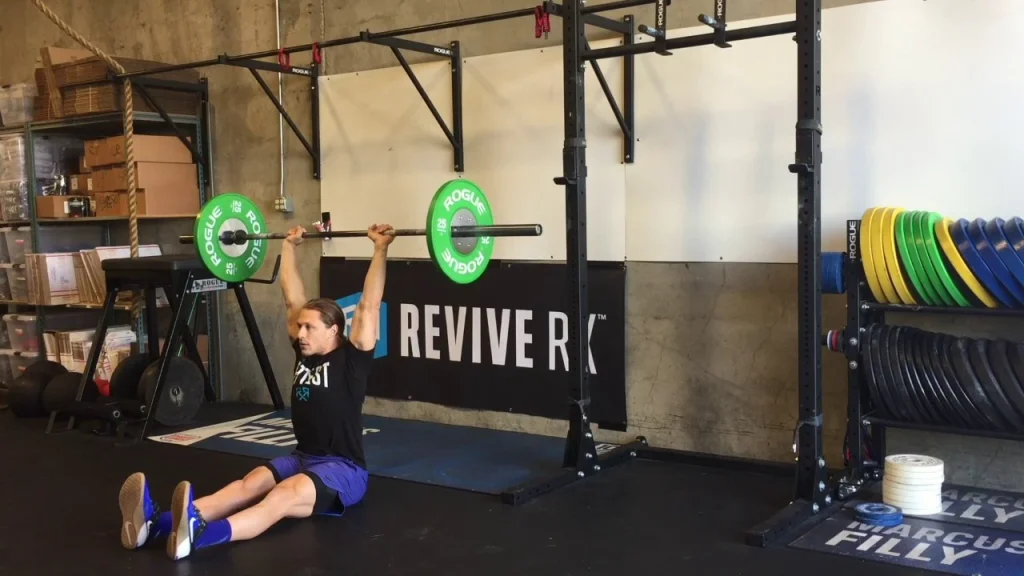
The Z press, short for Zydrunas press, is an advanced (and unique) seated overhead press variation that requires significant mobility and core stability. It’s a relatively simple move. But don’t mistake simple for easy: it requires a lot of movement in your hips and a great deal of core strength, it is not the best choice for your average beginner.
For that reason, here’s a quick warning: if you’re a beginner, you may want to click away or, better yet, try one the variations or alternates listed below. With that in mind, it is important to note that there are a wide range of benefits that you will get specifically from performing the Z press – more on that later!
- The Z Press is great upper body pressing exercise
- It requires good mobility, flexibility, and core strength
- It's a more advanced exercises so is typically reserved for intermediate +
- Beginners can try alternatives or easier variations (see below)
So, without further ado, here’s everything that you need to know about the Z Press!
Benefits of the Z Press
In many respects, the Z press looks rather like a standard overhead press. But due to the seated position of the exercise, it requires a rather unique overhead pressing technique in order to perform the press. And that positioning, in turn, leads to some great benefits.
Let’s take a look at some those.
1. It’s great for improving the strength of your overhead press
The main thing to note about the Z press is that you can’t use any leg drive since you are sitting down when performing the move. This is in contrast to a standard press in which most people use their legs to squeeze out the last few reps.
While there’s nothing wrong with that, the focus is then no longer on your press. With the Z press, though, the strength you gain is specific to pressing as leg drive is eliminated. More upper body gains? Yes please!
This is fantastic if you are looking to build on your upper body strength, since that’s all you’re working. The legs are taking a seat, so to speak!
2. It’s great for the core muscles
If you want an exercise that works not only your arms and shoulders but also your core, you are in luck In fact, a common complaint from people after doing a z press is that their abs are sore soon afterwards.
Because your core muscles have to stabilize your torso and the weights in order to keep you upright, this movement requires a significant amount of strength and tension in your core. It’s significantly more than when you’re doing a standing overhead press and more than even an overhead squat.
In a normal overhead press, the muscles in the lower half of your body would make adjustments to help support the weight. This isn’t even a choice when you are doing a z press – the weight shifts to your core instead.
3. It’s useful for strength
Because of the focused attention on your shoulders, it’s also a fantastic movement for strength.
Many lifters – at least those that do the movement – will tell you that their triceps and shoulders reap more benefits than when compared to other overhead pressing movements. As the tweet above said, it’s a great bang for your buck 1 I hear there are some places in Vegas with that very same slogan.
4. Variety – It’s the Spice of Life!
Do you know what makes training really boring? Yep, it’s when you do the same move set day after day. Who wants to do the same thing over and over again?
There are a lot of potential benefits to switching up your routine, including mental satisfaction, better hypertrophy and strength gains.
Cons of Doing a Z Press
While there are a lot of benefits to doing the Z press, it is certainly not without its negative aspects. This highly specialized movement comes with some challenges.
1. Mobility Concerns
You’re going to need to good mobility in your lower body – specifically hip flexor mobility – in order to do the Z press. It’s important to extend the legs when doing this move – which requires hamstring flexibility – all while you are bracing your torso. This is not a simple thing to do. There are many lifters that even find this movement incredibly challenging.
You also need some upper body mobility, specifically in the thoracic spine. All that and that’s just with a basic barbell, no extra weight involved!
And, by the way, don’t ever add weight to an exercise if you can’t do the exercise with correct technique. Do the skill first, then add weight as warranted.
2. More Safety Equipment Required

All you need for a standard overhead press is a barbell and some weight plates. If you want to stay safe while doing the Z press, however, you are going to need to have safety arms.
If you have safety arms then the racking and unracking process will be a lot safer for you. If you don’t have them then you are going to have to reach down to the floor. In most situations this is just inconvenient, but it can also be dangerous if you aren’t careful. It is possible to use j hooks instead, but this also isn’t the best choice for the movement since you may end up losing your balance.
3. You’ll need good core strength
You can’t rely on your legs when you’re doing a Z press. Instead, you’ll need to have pretty serious strength in your core muscles to execute this move.
If you don’t have a lot of abdominal strength to begin with then you need to be extra careful when you are doing this move, especially if you are a beginner.
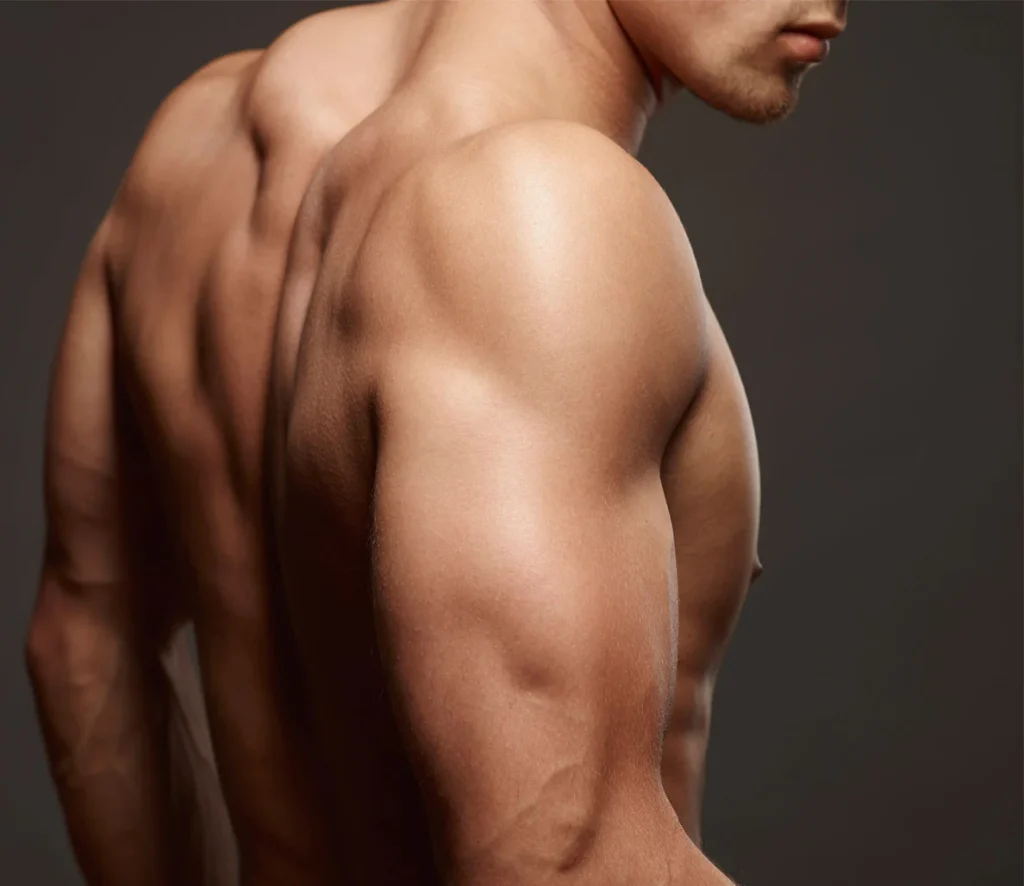
What Muscles Does The Z Press Work?
So now that we know the why, let’s at the what and how. There are a number of muscles worked in the Z press. Specifically, the key ones are:
- Erector spinae
- Obliques and abdominals
- Triceps
- Deltoids
- Trapezius
- Upper pectoralis
- Scapular stabilizers
Muscles for Pressing
When you move the barbell or dumbbells over your head, there are three main pressing muscles that you are targeting. These are the upper pecs, triceps and the front (or anterior) deltoids.
But why is this, exactly? Well, it’s because you are doing two key things when you are doing a z press. First, shoulder flexion is occurring – this is when the upper arm moves from resting at your side to straight overhead. This movement includes anterior deltoid, pectoralis, and various supporting muscles.
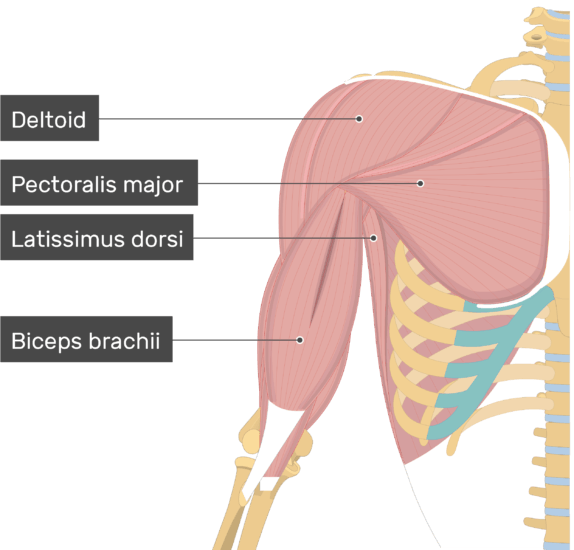
The next action is an elbow extension, which occurs when you straighten your elbows as you push the barbell upwards. This primarily works your triceps.
The Stabilizing Muscles
The pressing muscles aren’t the only star of the show, mind you! The stabilizing muscles also take center stage. Your stabilizing muscle groups need to work hard when you are doing a Z press. More specifically, your obliques and abdominals, subscapularis, traps, and the erector spinae.
Then, the muscles in your core – namely, the lower back muscles, abs and obliques – are put under strain when you set and keep your properly seated position. This means that a strong core is required – and trained – in order to do the movement. So, in reality, you’re a large portion of your upper body in one pressing movement!
Performing the Z Press
So we’ve explored just a few of the muscles that the Z press works and what you can gain by doing the exercise. Now it’s onto the most important part – how do I do it?
It’s worth noting that in order to be successful at the Z press, you should have mastered the basic overhead press. If you haven’t then you are much more likely to get injured from improper technique or lack the requisite strength.
Since barbell z presses are most common, let’s look at 6 steps to perform a rep.
1. Make Sure the Safety Arms are Set Up
Find a squat rack.
When it comes to lifting weights, you should work smarter, not harder! For that reason, you should set up a way to make the Z press much easier for you. Make sure that the safety arms in the power rack are at the correct height for you to perform the move. Ideally, the safety arms should be positioned at the same height as your knees.
Once you have done this, you simply need to put the barbell on the safety arms before you get started.
2. Take A Seat, Make Sure the Safety Arm Height Is Correct
Hopefully by this point you’ve taken our advice and set up the safety arms. Once complete, take a seat on the floor. Then, simply stretch your legs out in front of you, spreading your feet slightly apart. You need to make sure that the legs are angled roughly 30 degrees from the midline.
Make sure that you’re sitting up straight, then start rolling the bar in the direction of your body. When sitting, the bar needs to be positioned slightly higher than your armpits. If the bar is slightly too low or high, adjust the arms until you get to a height that works for you.
3. Roll the Bar and Arrange Your Grip
Now that you’re sorted out properly, position the bar so it’s ready to grab.

Eventually, the barbell will be at a point where it’s almost directly next to your upper chest in a front rack position. At this point, stop it in its tracks, placing your hands onto it.
Grip the bar in such a way that the forearms are in a vertical position from the bottom of the bar. Generally, your arms will be wider than shoulder width apart but feel free to adjust as needed.
4. Put The Bar In Position
Now that you’ve got the bar next to you and you’re gripping onto it, it’s time to begin the move. To start, begin to lean forward just a tiny bit. Then, quickly dip the elbows right under the bar, sitting up in the process. The bar will then be a tiny bit higher than the safety arms, since it is now being held up by your arms.
5. Time To Press
Now it’s time for the hard stuff! When your grip is locked in and the bar is in the correct starting position, take a moment to breathe in deeply. Prepare your abdomen and core, then press the barbell overhead. It may skim past your nose as you move it upwards.
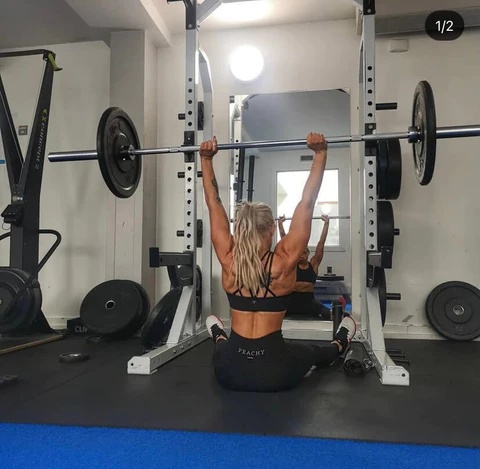
Once it starts to pass the forehead, you can then put the bar slightly back – the whole movement or bar path should somewhat resemble a Z shape in terms of motion. Then, lock the bar over your head making sure that your elbows are straight.
6. Rack It
Once you’ve done your rep/s, safely (under control) lower the bar back on to the outstretched safety arms. And with that, you’ve done the Z press!
Variations
While Z presses are most often done with a barbell, they absolutely can be done with dumbbells, kettlebells, or even sandbag. Here are two great variations:
Kettlebell Z Presses
I’m a big fan of the kettlebell z press, as I find the kettlebell allows me to “set” my shoulders back and my shoulder blades down properly. Although it varies based on strength levels and shoulder mobility, most will find this version a little bit easier and/or more comfortable.
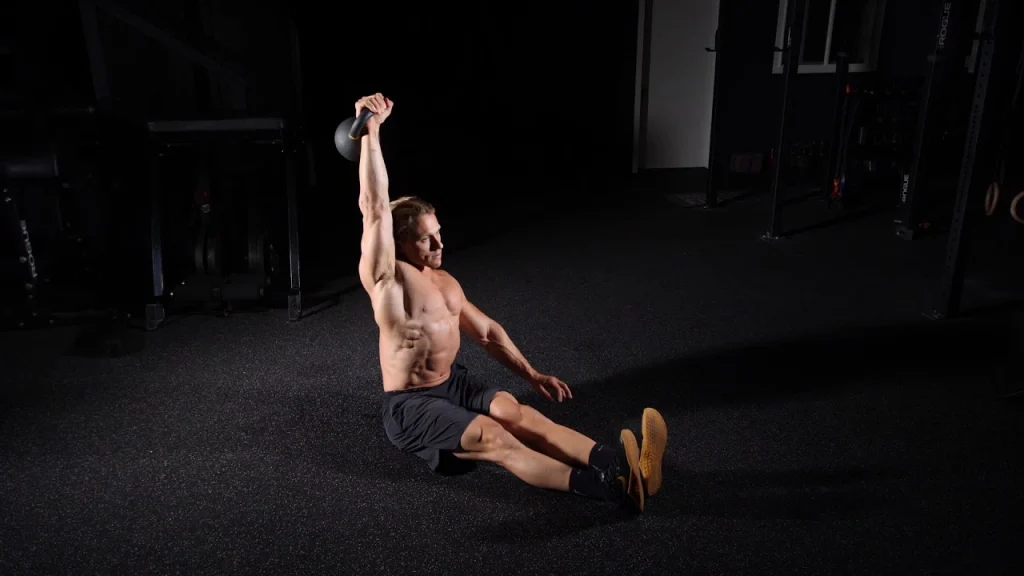
Additionally, depending on your needs, you can work this unilaterally or bi-laterally.
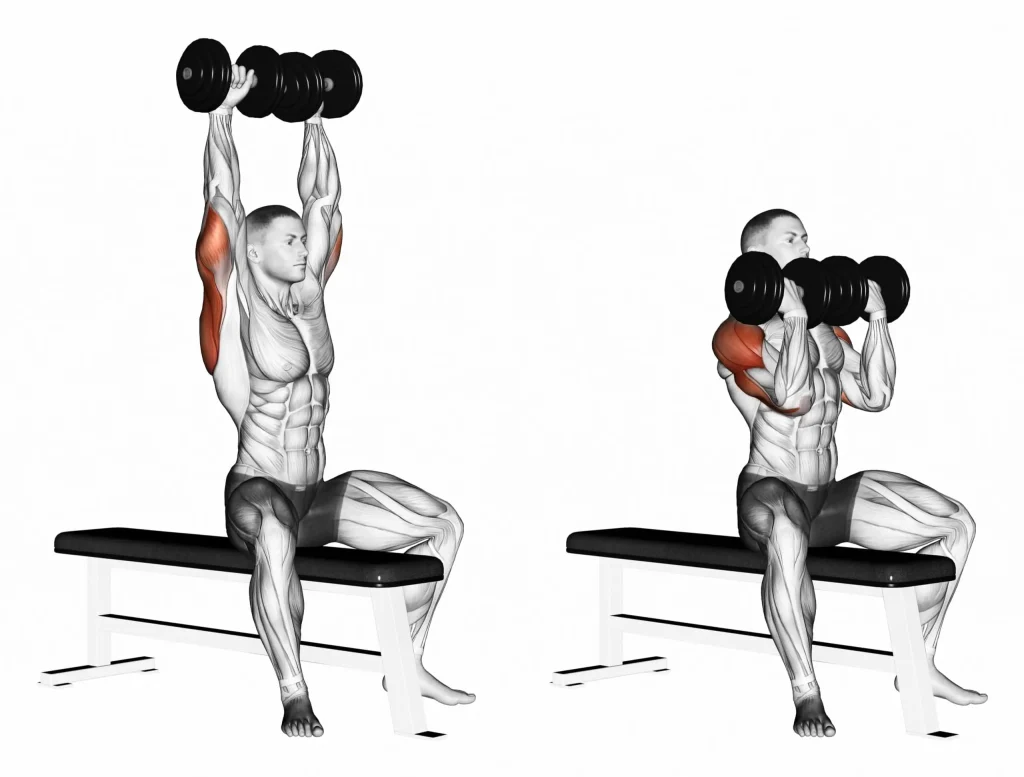
Dumbbell Z Presses
If you’re just learning to Z press, the db z press 2 adjustable dumbbells are great for this , is a great option. Not only can you use lighter weight than a standard 45 lb. bar, your shoulders can rotate more freely too.
And then once you’re comfortable with the pressing motion, you can move to the barbell z press or add additional weight to the dumbbell version.
Alternatives
There a ton of alternative or accessory pressing exercises; here are two of my favorites.
Arnold Press
The Arnold press 3 yes, named after da Terminator is theformer Mr. Olympia’s take on a shoulder press. While it’s not as taxing to the core and doesn’t require quite the mobility, it’s an effective overall deltoid exercise.
The Arnold press recruits all three parts of your shoulders – with the result that you build fuller, wider, and more defined shoulders. As an added bonus, it can be done both seated and standing and can be used by beginners to advanced athletes.
Landmine Press
An underrated and somewhat unknown exercise, the Landmine Press is great for shoulder development and for developing power. It’s a great variation for beginners but there are more advanced variations – such as half kneeling or banded presses – that are suitable for more advanced lifters.
If you’re curious to learn more, you can find my complete Landmine Press guide here.

Things to Avoid When Doing the Z Press
There are a lot of mistakes you should avoid when doing a Z press. Here’s are a few of the most common:
Leaning Backwards too Far
Sure, you will probably find the move a lot easier to do if you move further back as it’ll be similar to a seated incline press. However, that’s poor form for a Z press.
Instead though, you keep an upright torso. Keep straight legs, everything braced, and don’t move anything except your arms as you are pressing the barbell upwards.
Bend The Knees
This is not Game of Thrones – this is not the time to bend the knee! The problem with bending your knees is that it means you don’t need as much hip mobility, which is an issue. It also won’t work your core as well, as your heels or feet can press into the floor to make it easier for you.
Instead, you should just remind yourself to keep your legs extended, knees straight (a slight bend is okay), and an upright posture.
Twisting the Body
One side of the body usually is stronger than the other which can lead to twisting your body when doing a Z press. That’s a bad idea as it can unduly stress your spine. To prevent that, focus on keeping your shoulders and the hips in a stable position the whole time and reduce the weight.
If that doesn’t work, try the kettlebell or dumbbell z press or one of the alternative exercises listed above.
Summary (TL;DR)
If you’re an intermediate to advanced lifter, it’s certainly worth your time to do – or at least try – the Z press. It’s an advanced exercise that targets large, key upper body pressing muscles all while developing a stronger core.
While it isn’t the best choice for a beginner, give it a try if you have some experience under your belt and you want a new, challenging overhead press variation for your workout routine.
And to put it all together, here’s a quick video overview –